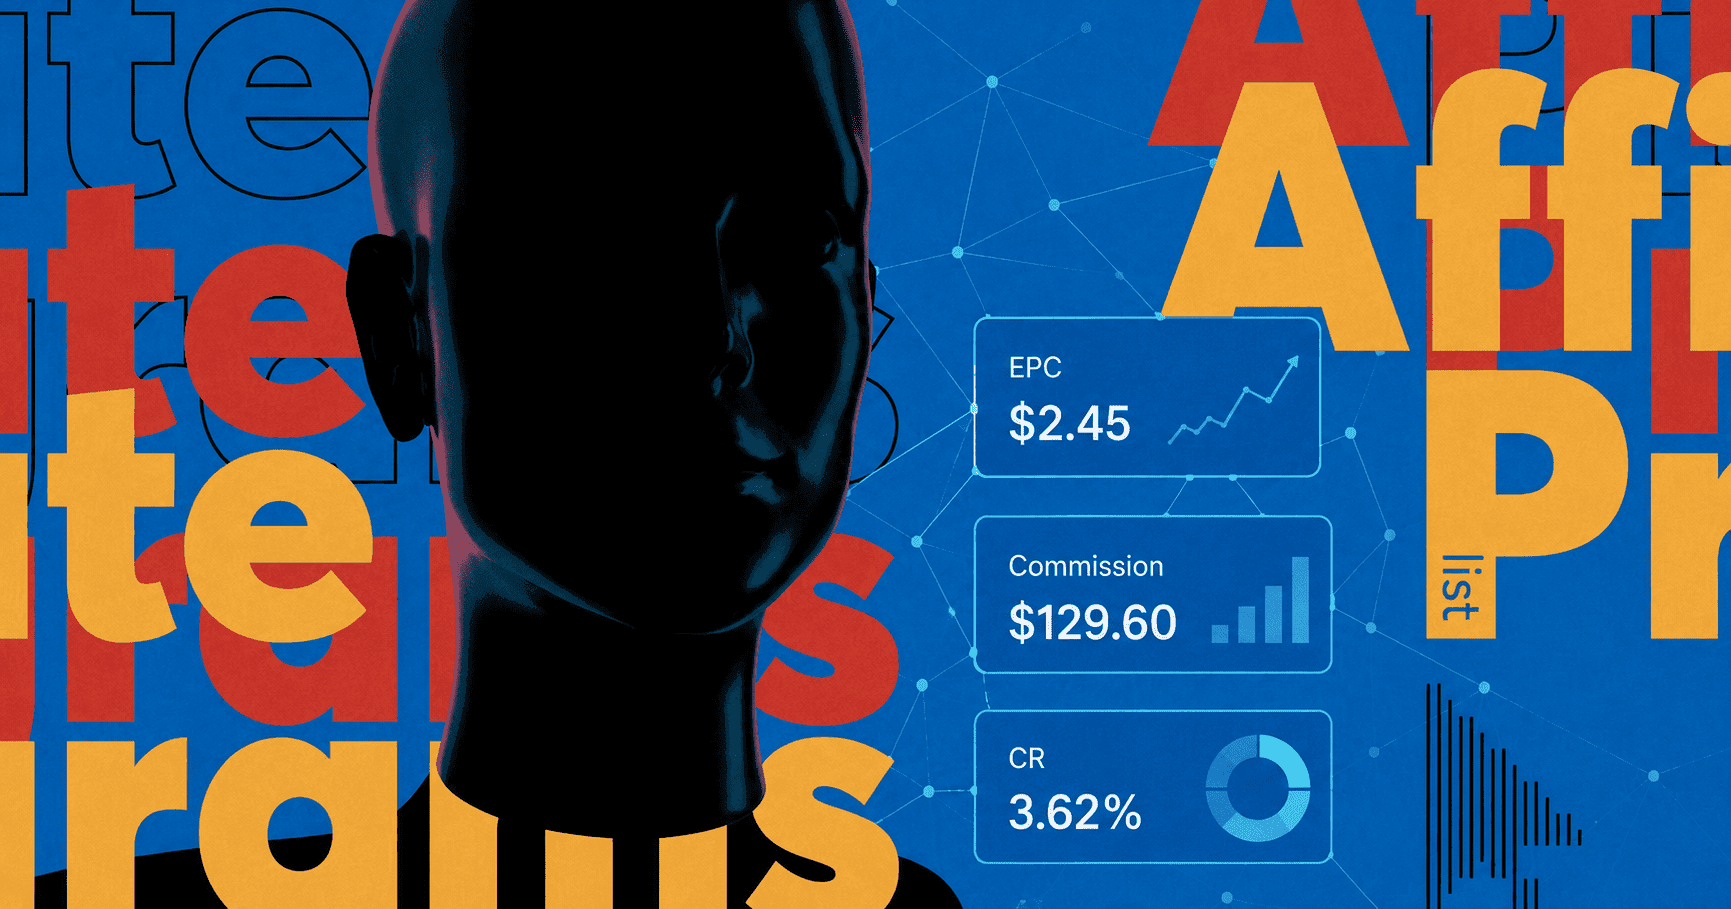
By tracking conversions, marketers can understand the actions users take on a site and put these insights to work in order to boost the campaign results. The MGID Pixel gathers all necessary data on users’ page visits, video views or actions enabling one to create, track and re-engage custom audiences.
In this guide, we will show you how to install the MGID Pixel and measure different types of conversions.
How do I track conversions?
Use the MGID pixel to track users’ actions after landing on the owned site. Specifically, you can track the following conversions:
- URL-Based Conversions
- Event-Based Conversions
- Postback Conversions
- View-through conversions
Before tracking, the pixel has to be installed on the header of every page of the site.
Once you get through the pixel installation process and make all necessary settings, you will be able to view the data on them in campaign reports.
Note: It’s important to implement the pixel prior to activating campaigns.
MGID pixel installation
There are three options to install the pixel code:
- Manual installation of the Sensor code on the page
- Implementation via Google Tag Manager Template
- Installation using the MGID Pixel Cloudflare app
MGID Pixel does not affect the page performance or SEO page ranking because these elements are loaded asynchronously.
Make sure to use one of our previous guidelines if you want to implement the pixel using Google Tag Manager.
Now let’s move on to the first installation option.
Manual installation of the Sensor code
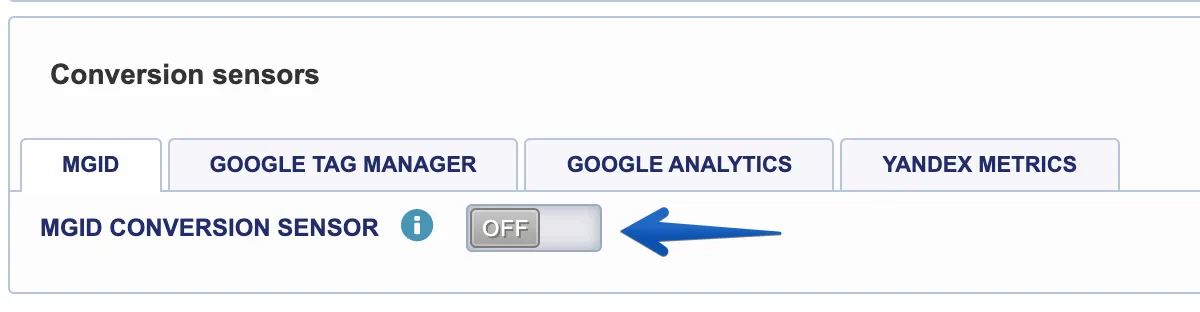
First, click the “MGID conversion sensor” button at the bottom of campaign settings in the Dashboard.
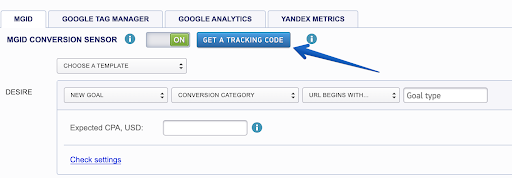
Then, click on the button “Get a tracking code”.
To copy the Sensor code to your Clipboard, click on the grey code area in the pop-up box.
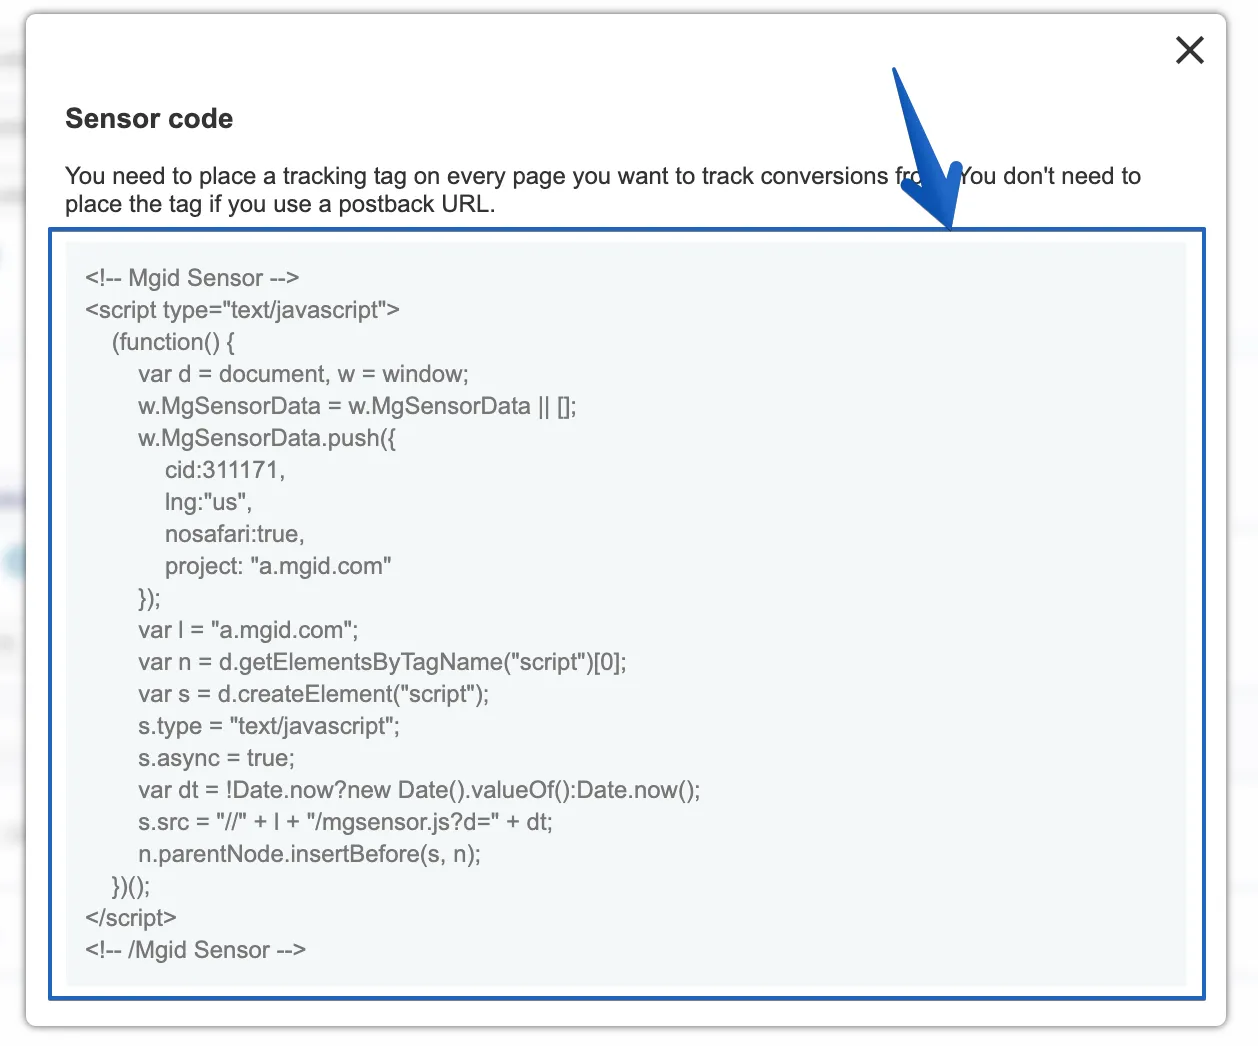
Paste the Pixel Sensor code in the header of each page of the site.
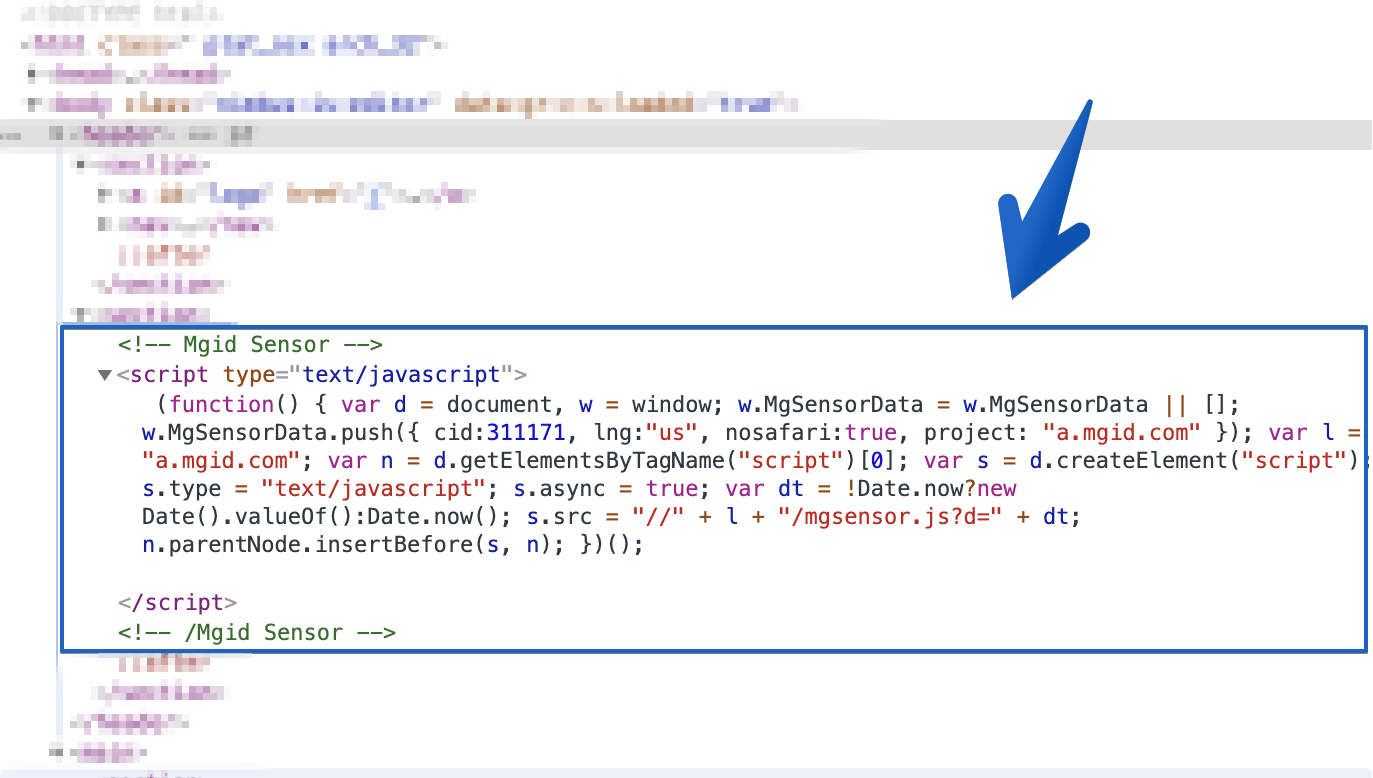
Gentle reminder: You will need to make sure the pixel has been installed in the header of every page on your site in order to track conversions.
Collecting and analyzing data
MGID Pixel tags collect the following information of user interactions:
- IP address of the device that accessed the page on which the tag appears
- URL of the page on which the pixel tag appears
- time and duration of a pageview
- identification number (the long string of characters) of any cookie previously placed by that server on the user's device
- other pages that this user viewed
- clicks made by the user
We wish to stress that MGID is compliant with GDPR and CCPA, so no personally identifiable information is stored via MGID Pixel.
In addition, MGID officially registered to be a member of IAB Europe’s Global Vendor List, and all information that can be stored by MGID is listed in the vendorlist.
Now, let’s dive into tracking key types of conversions, URL-based and event-based conversions.
URL-based conversions
URL-Based conversions allow tracking conversions linked to the page the reader lands on. Installing the tracking code in the header of every page on site will allow us to generate different URL-based events and track them accordingly.
Begin by choosing NEW GOAL and click on the “URL Begins with”.
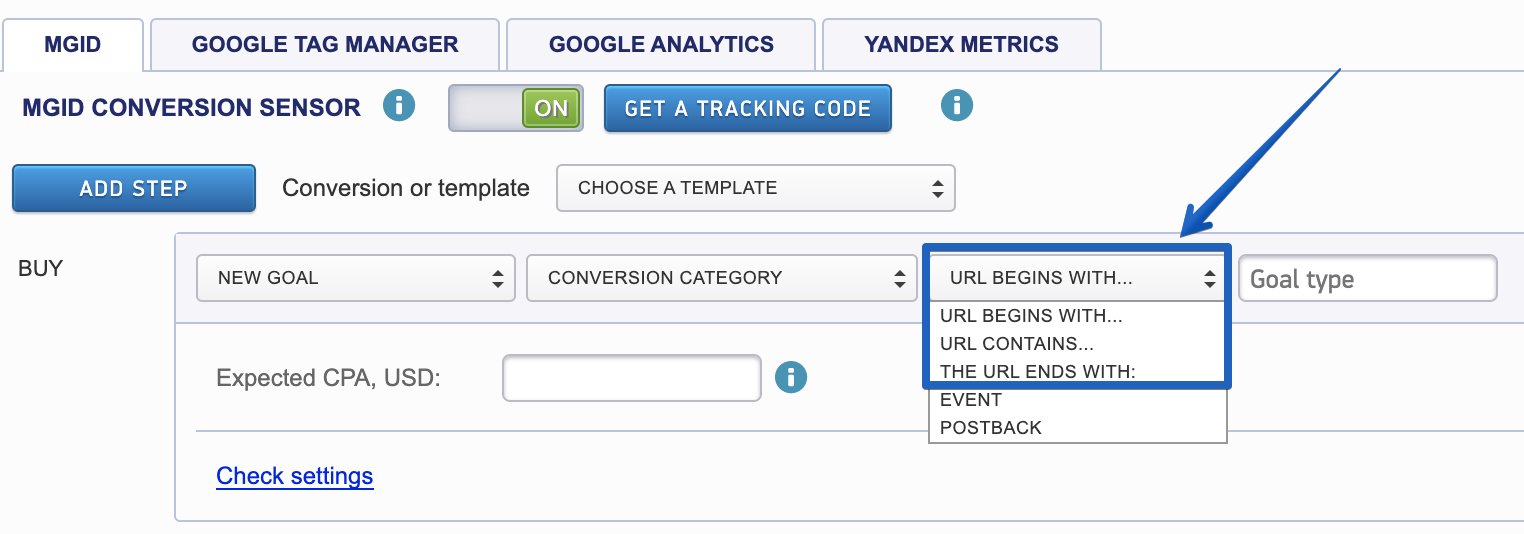
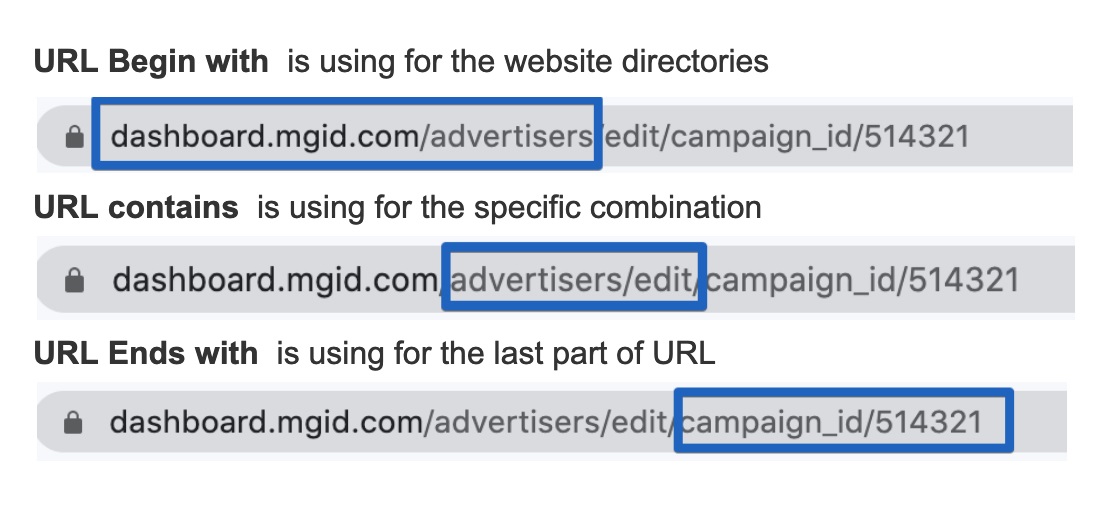
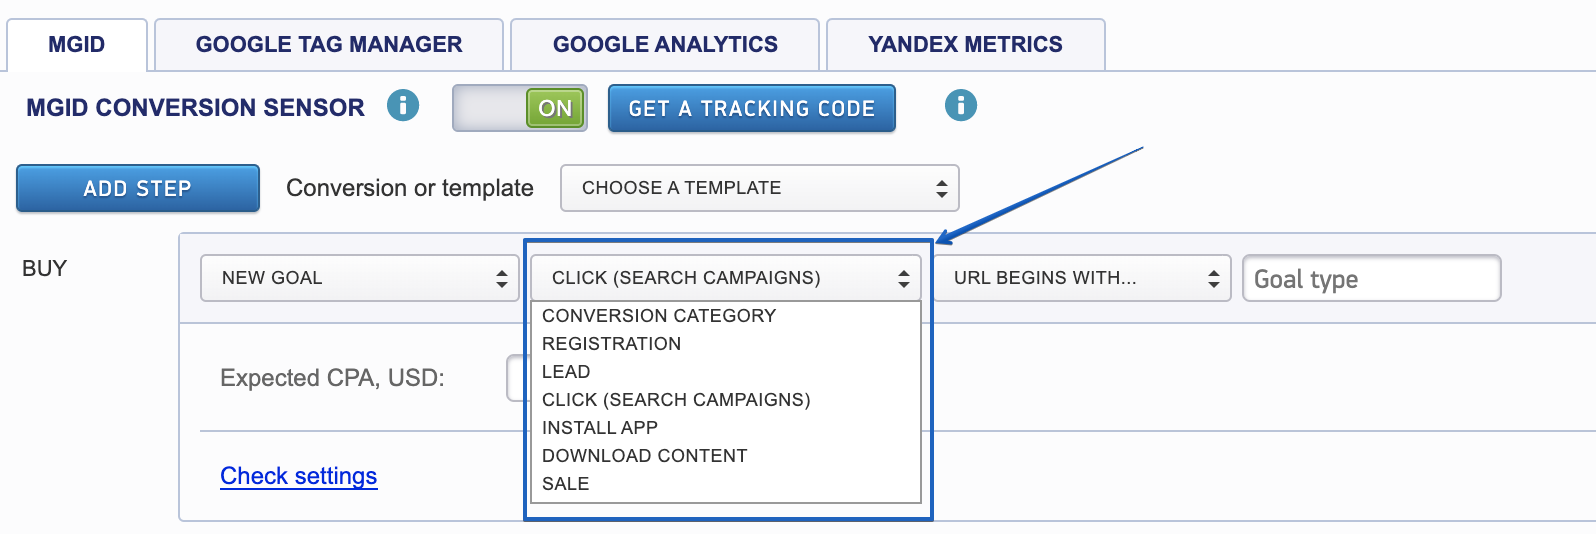
There are three options you can choose for URL-based conversions:
To choose the category click on the Click (Search campaigns).
Set the unique Goal type in order to identify conversions in the displaying section.
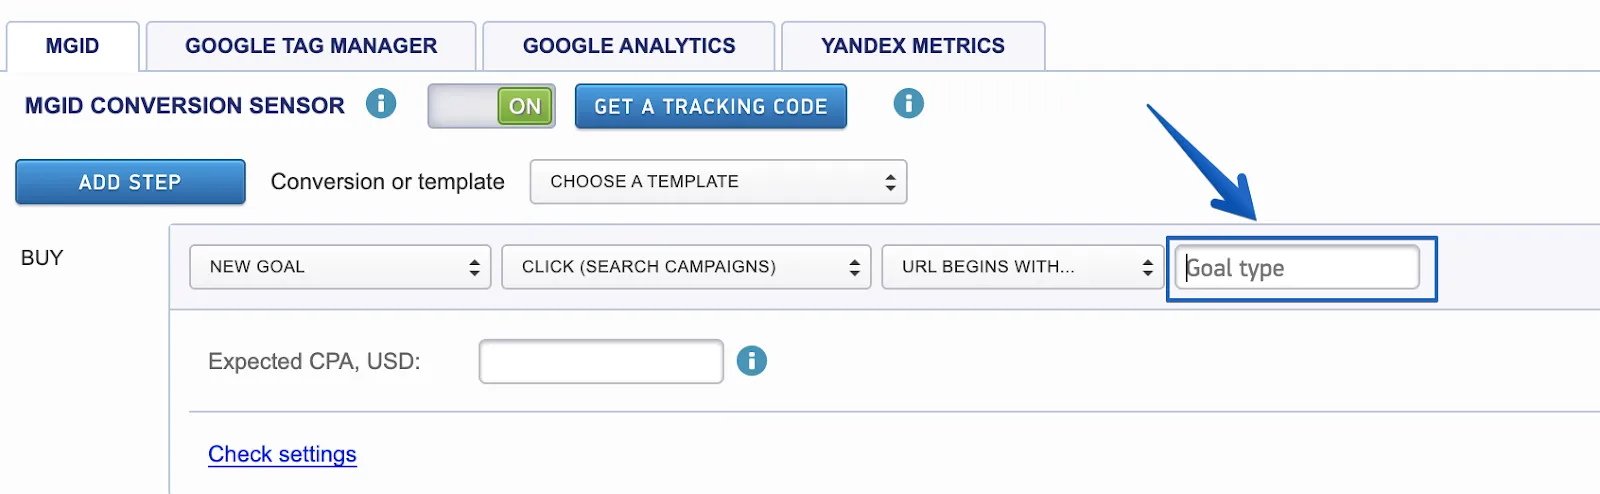
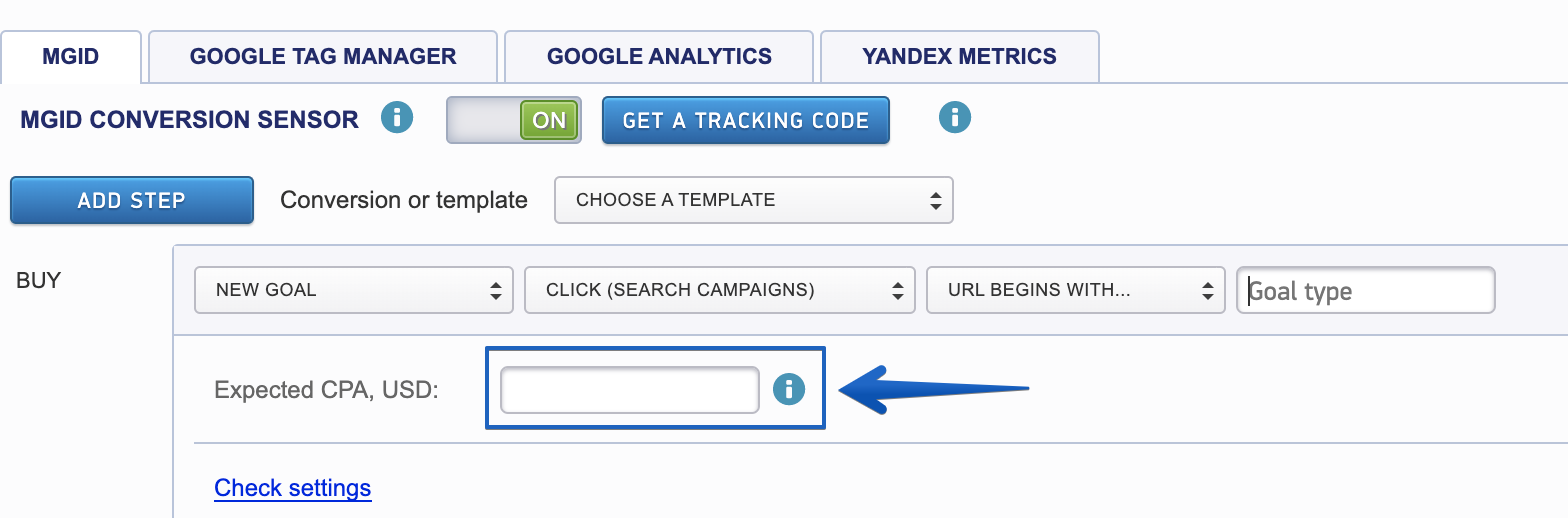
Set the Expected CPA to track content ROI.
To verify the pixel implementation, do the test conversion. Take these steps:
- Place the sensor code on each website page.
- Set up and save conversion steps.
- Follow the link and take the steps you set up the events for. Test clicks won’t affect the statistics.
- In about 15 minutes you will see the test conversion in the list of your campaigns. Test conversions are shown in brackets.
Event-based conversions
Event-Based conversions will track a specific action that a user is supposed to take on the site. For example, this can include button clicks:
- “Purchase”
- “Add to Cart”
- “Subscribe”
Begin by clicking on the “Event”.
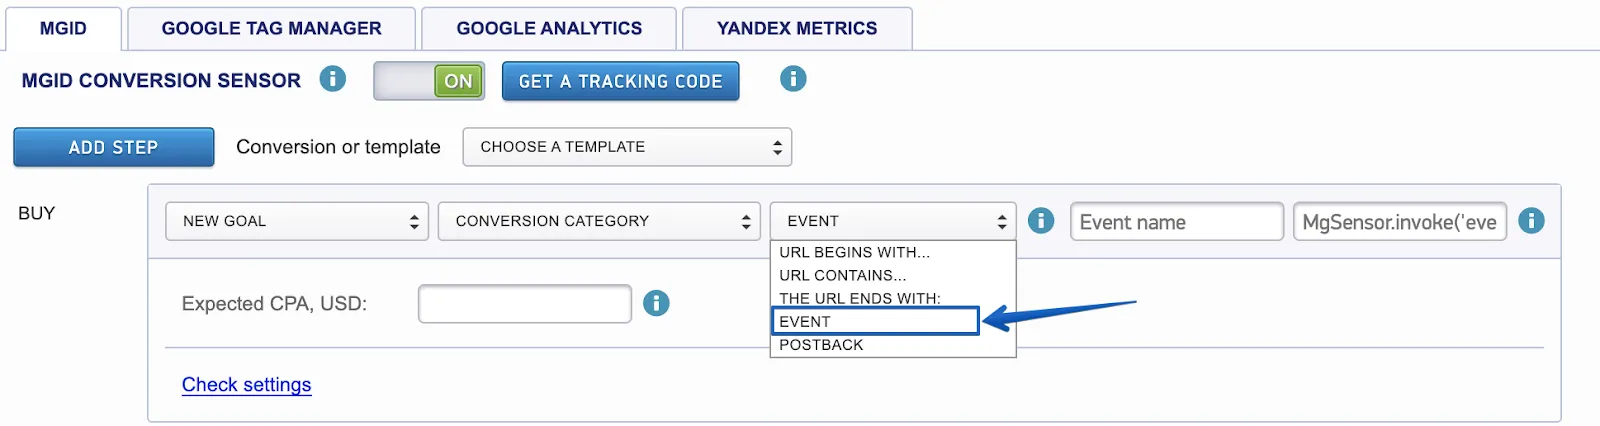
Choose the unique Event name.

As you set the Event name, it will be automatically included in the code. For example for the Event name “first_step” the code will be MgSensor.invoke('first_step'):

Copy the code to the clipboard and paste it on the site. For example, you may insert it into the code of the “Submit” button (depending on the goal).
Note: event action code can be placed simultaneously on several buttons on the same page.
Event action example
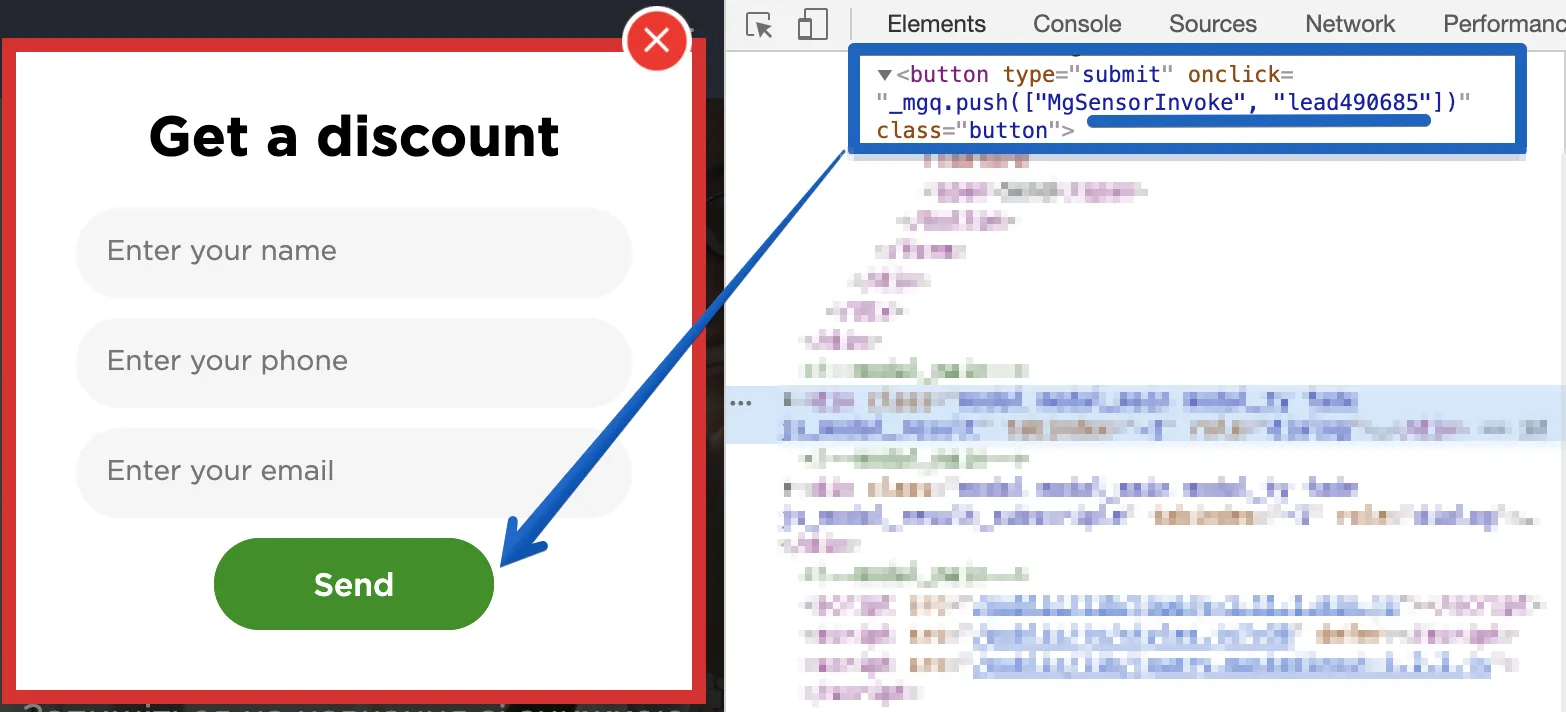
Let's assume that you want to track the event conversion of the specific button - the button Send.
First, you should enter the unique Event name in the Dashboard, for example, “lead490685”. Set the chosen Event name in the menu and receive the code:
onclick = '_mgq.push(["MgSensorInvoke", "lead490685"])'
Add the event onclick as an action to the necessary button. In our case, it is the button “Send”:
- Find the button in the HTML code
- Add the onclick action to the button:
<button type="submit" onclick = '_mgq.push(["MgSensorInvoke", "lead490685"])' class="button"><span>Send</span></button>
At the end you should get the following result:
From here, once the user clicks on the button Send, the Event is sent to the dashboard, and the conversion is counted in the reports.
Final word
Tracking conversions with the MGID pixel gives the ability to measure the impact and return on ad spend for all established conversion events, including product purchase, page view, pages signup or other actions based on campaign goals. In case you have any further questions or encounter some issues during the installation process, do not hesitate to contact our support team.