
In one of our previous blog posts, we covered the benefits of Accelerated Mobile Pages (AMP). Let’s brush up on those major benefits once again:
- their loading speed is between 4 and 31 times faster compared to non-AMP web pages;
- hence, AMP pages are more likely to be ranked higher in a search engine;
- being simplified codewise, they keep all of the necessary attributes of a website’s page;
- our studies prove that ads placed on AMP pages have higher CTRs;
- setting up all of a website's pages to the AMP format via WordPress is relatively easy with the help of custom-made implementation plugins.
The set up on the publisher's side consists of simply installing and enabling two AMP plugins into the website’s WordPress Interface.
Just follow these instructions to single-handedly install the AMP solution.
1) Installing AMP for WP Plugin into Wordpress
This plugin will be responsible for the actual generation of AMP pages.
1.1 Go to your Wordpress interface
1.2 In the menu field, find Plugins -> Add New and type in the search field “AMP for WP”
(Note: In the case when there are other AMP plugins previously installed, they need to be deactivated and removed from Wordpress.)
1.3 From the provided plugins, choose the plugin named “AMP for WP - Accelerated Mobile Pages”
1.4 Click on the “Install Now” button
1.5 The plugin needs to be activated after installation

After the activation of AMP for WP, a few important settings in the plugin need to be made to allow for all AMP pages to work properly.
Please follow the next set of instructions. They will be mentioned in the interface of the AMP for WP plugin once it is installed and activated.
2) Setting up AMP for WP Plugin into Wordpress
2.1 The “Settings” Section
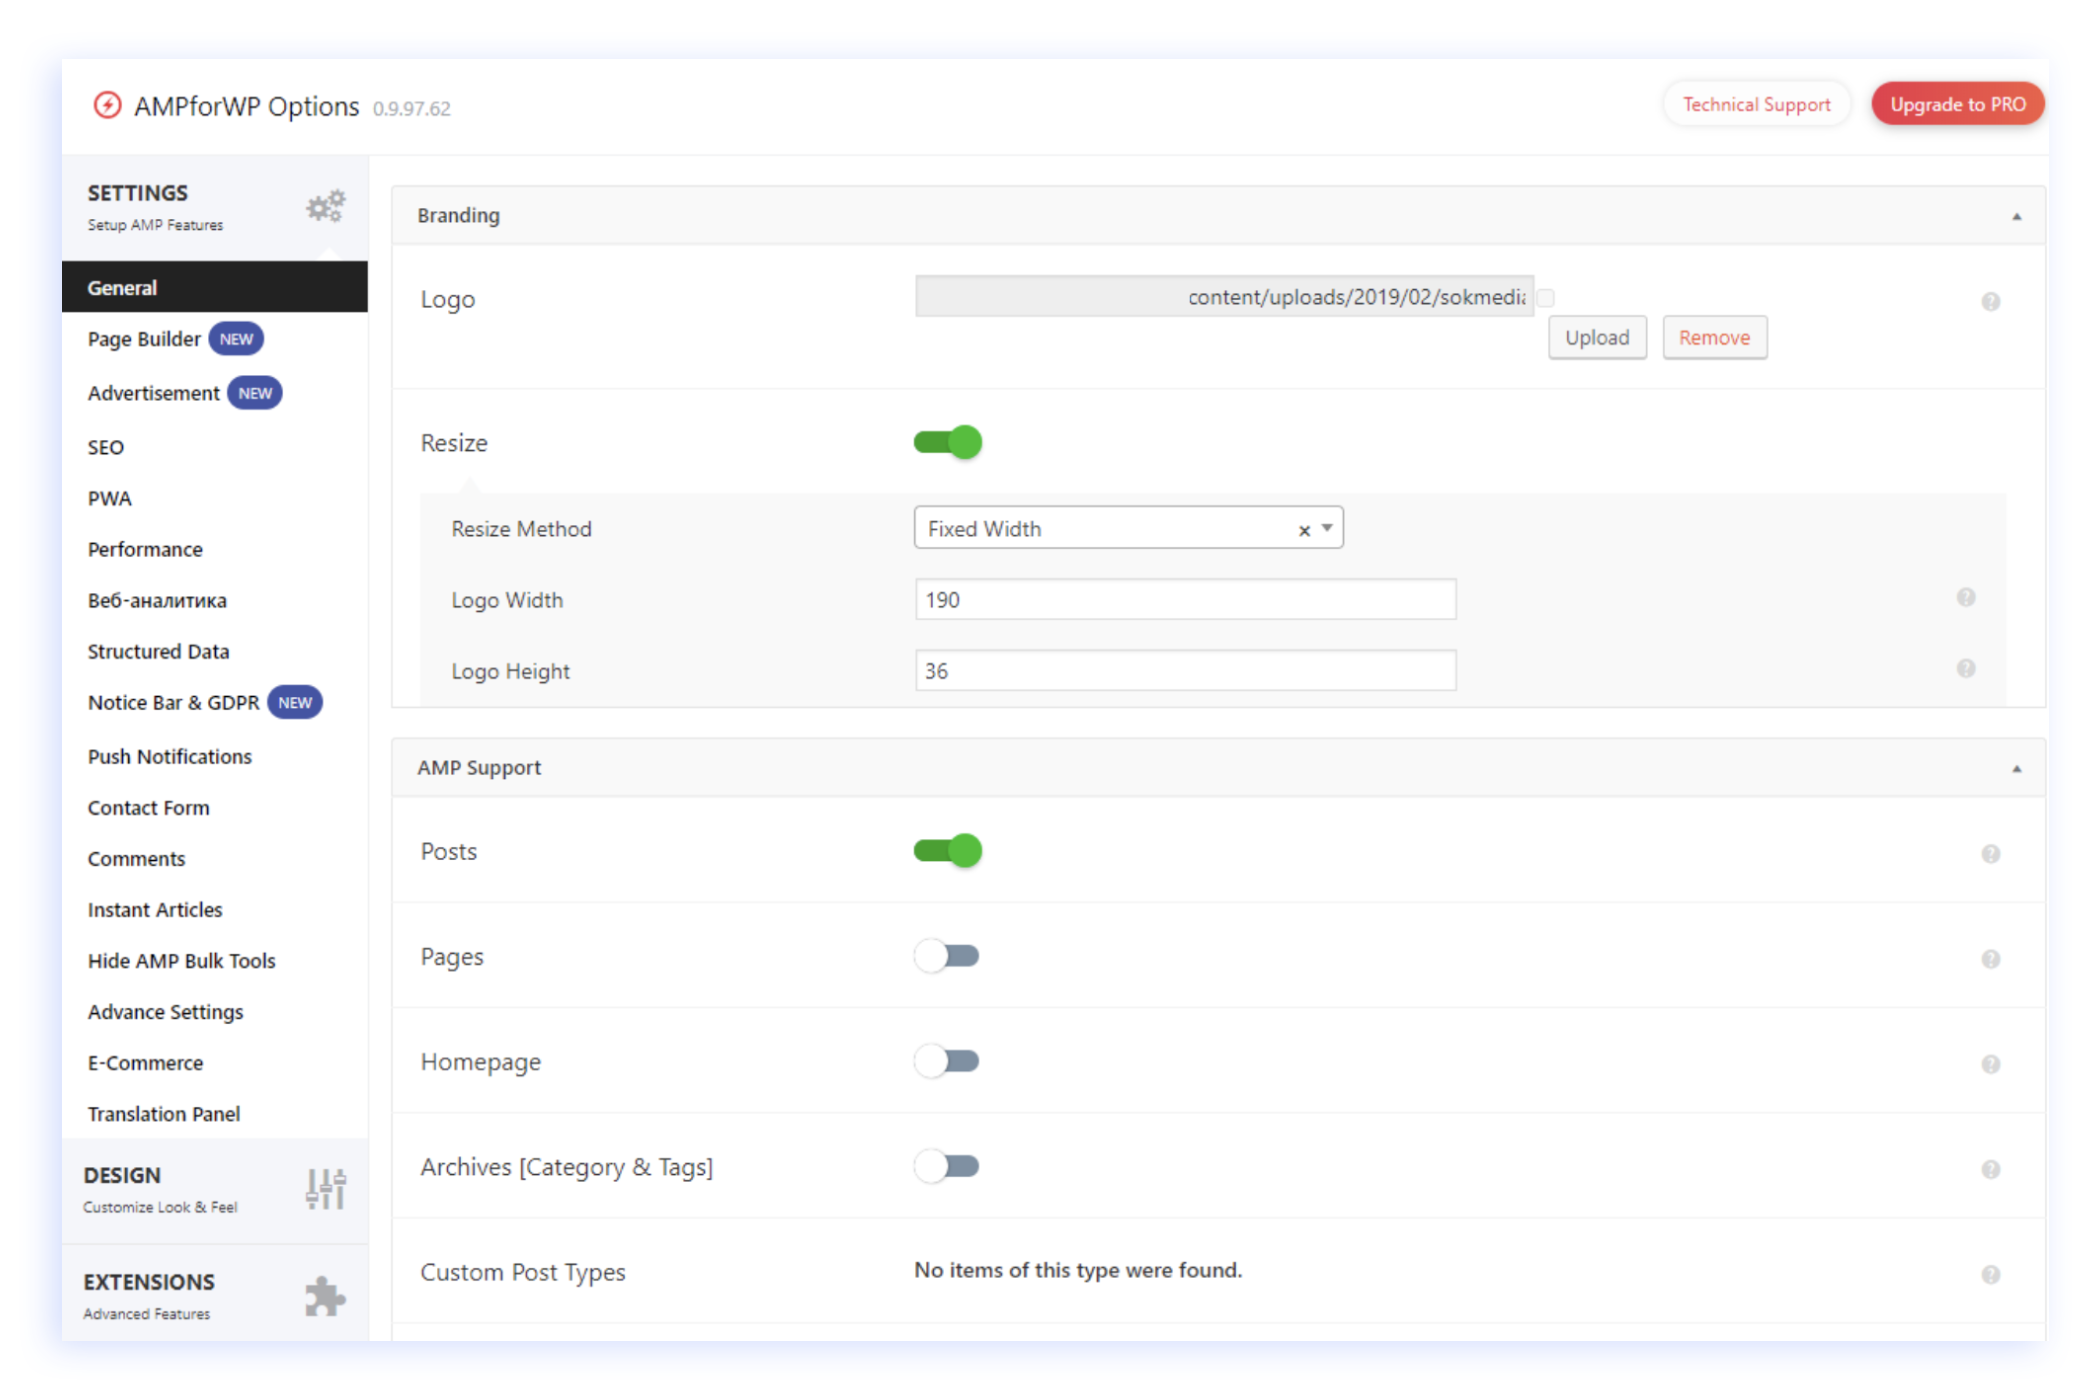
GENERAL
- Set up the logo of the website to match the AMP standards
- Choose the logo from your Wordpress inventory;
- By turning on “Resize Method”, you can customly adjust the size of your logo to match the AMP page layout.
- Turn on “AMP Support” only for “Posts”
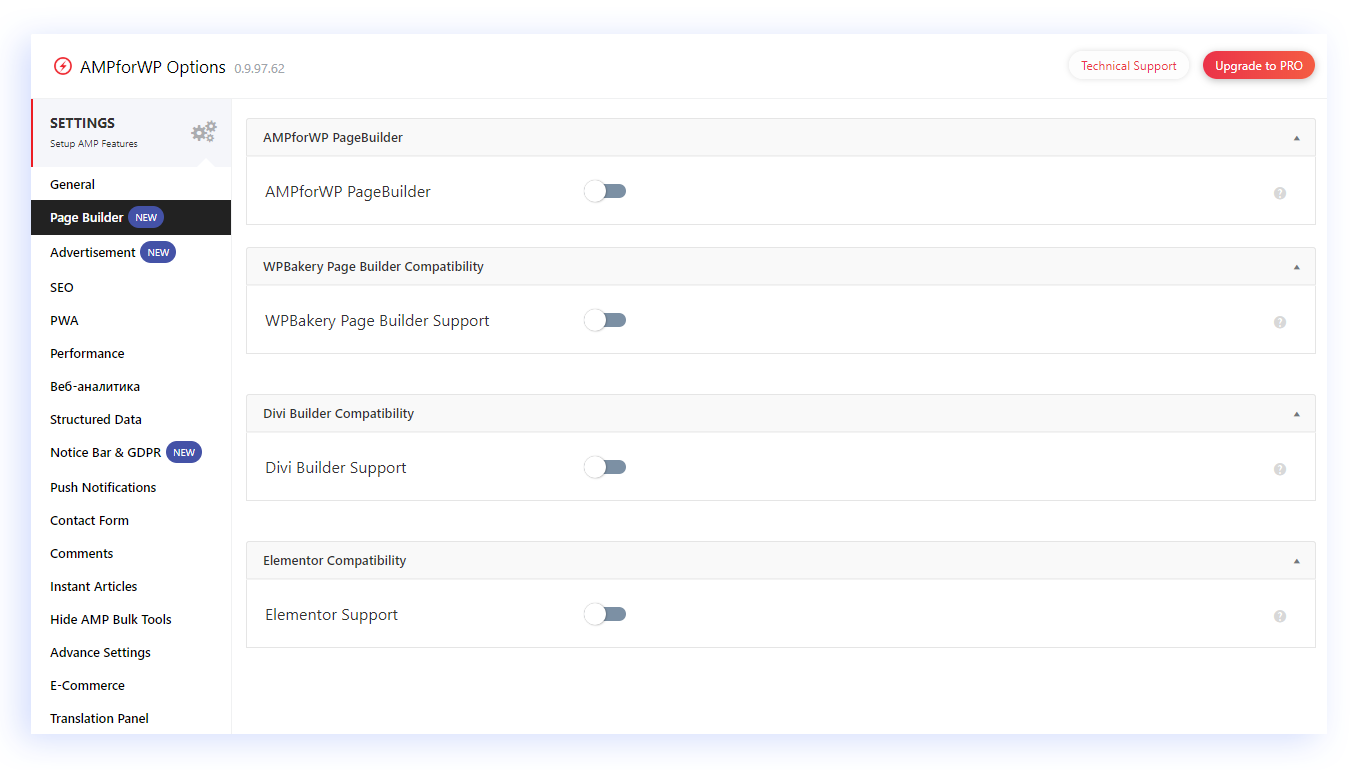
PAGE BUILDER
- Deactivate all settings in Page Builder
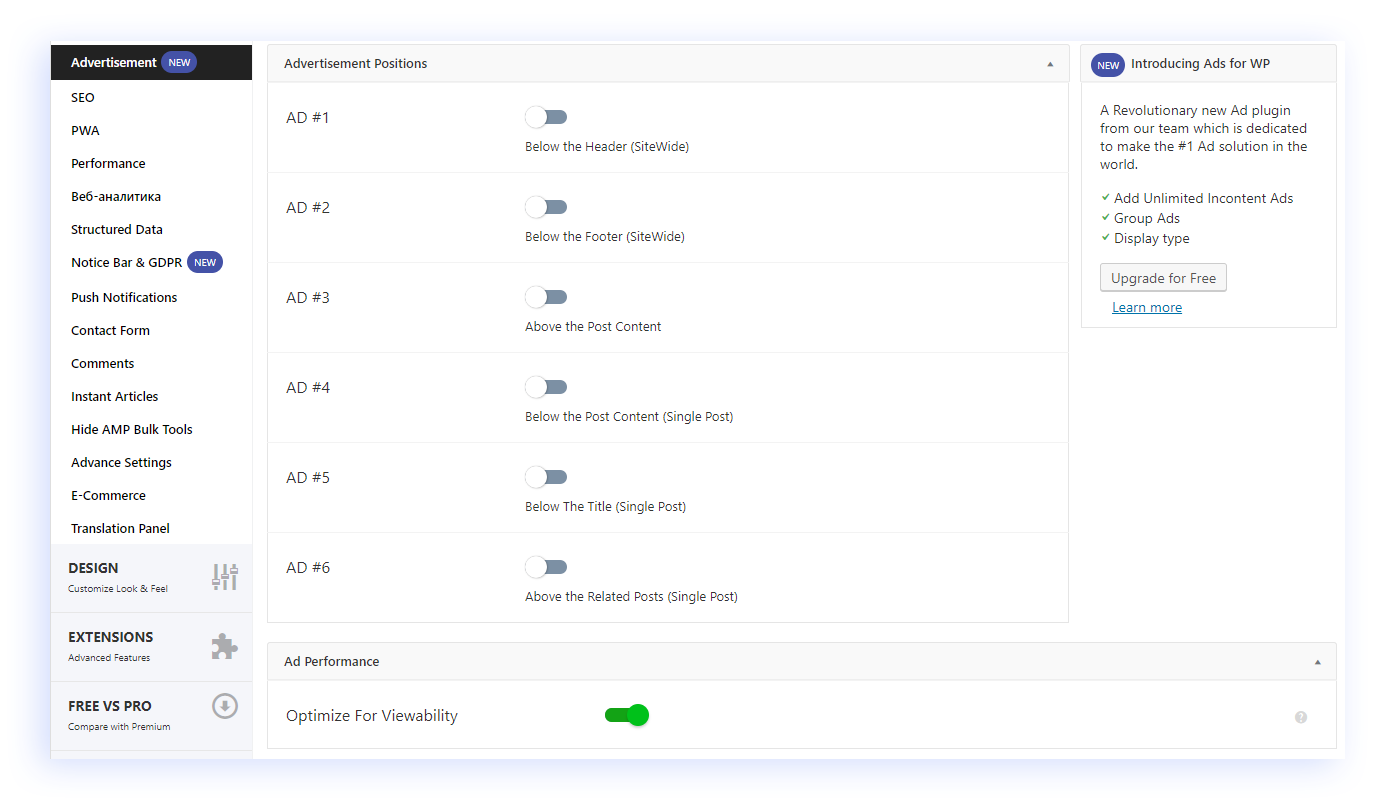
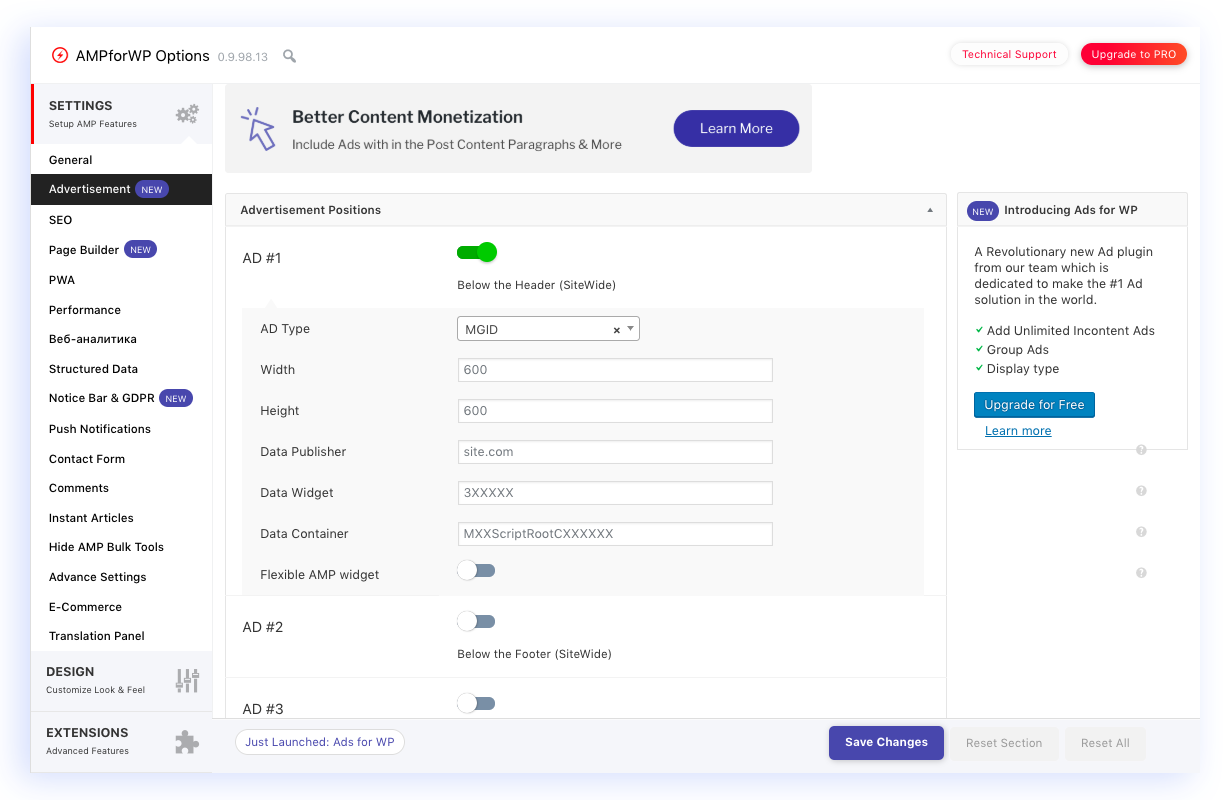
ADVERTISEMENT
- Choose “Optimize for Viewability”
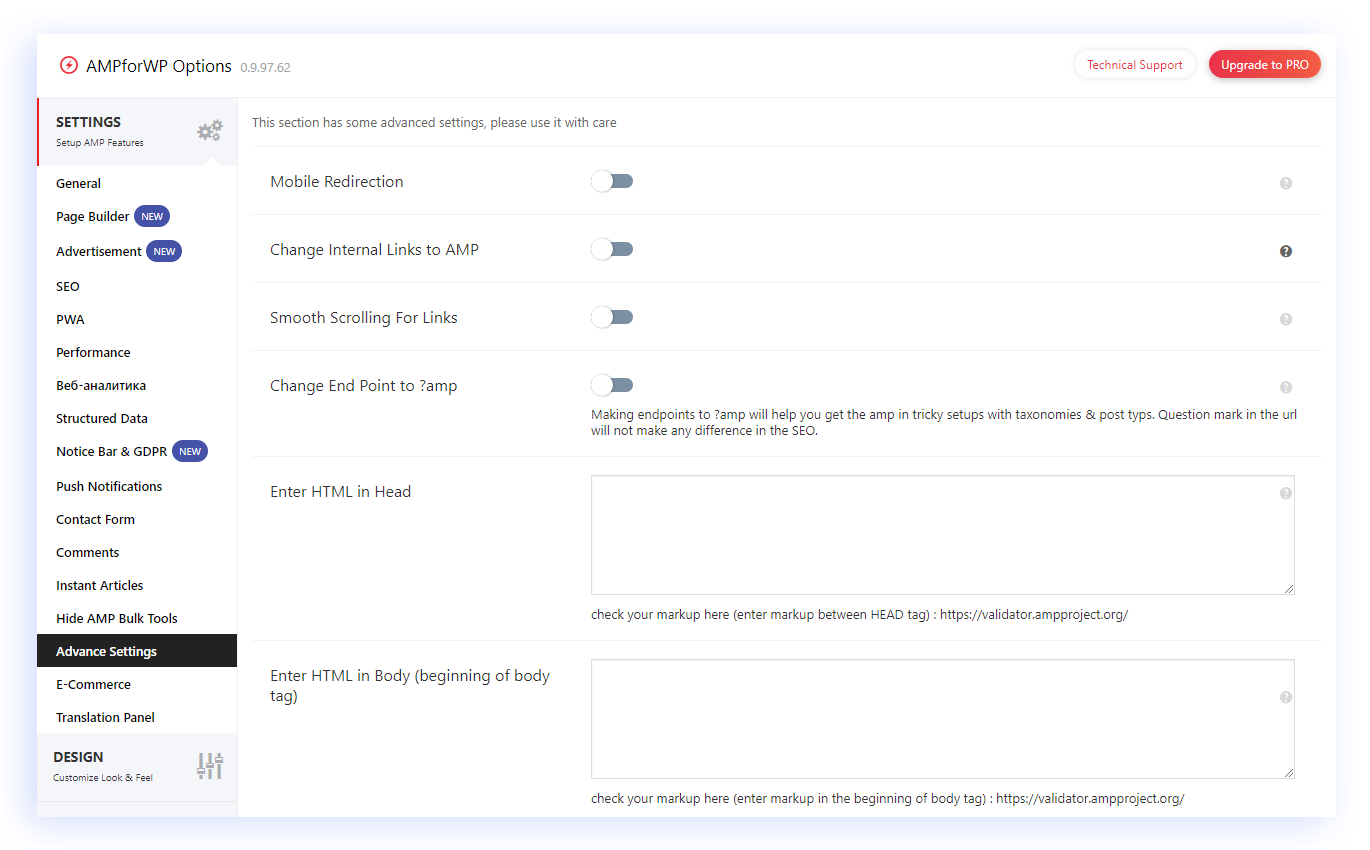
ADVANCED SETTINGS
- Deactivate all settings in Advanced Settings
2.2 The “Design” Section
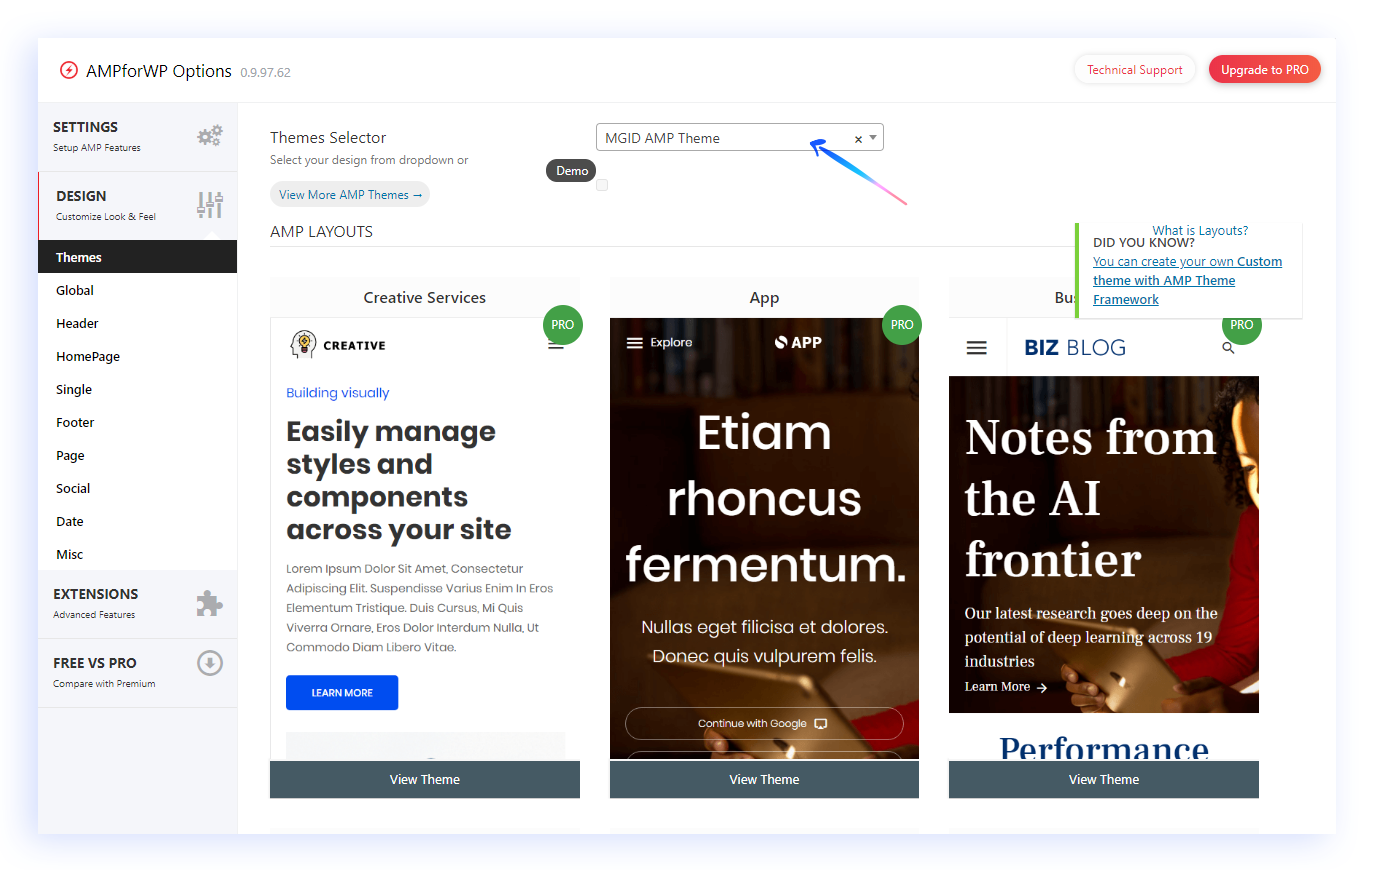
THEMES
There are two options you can choose from here.
Option 1
- Select one of the custom WordPress themes from the drop-down window.

- Then go to the Advertisement settings, create a new ad, select the Ad Type – MGID and fill in the rest of the fields as described in our previous blog post.
Option 2
- Add MGID AMP Theme Plugin into Wordpress
This plugin will be responsible for the layout set up of the AMP pages, making sure all AMP pages are displayed in the most mobile user-friendly and compact way possible.
- From the drop-down window in “Theme Selector”, choose MGID AMP theme design previously installed.
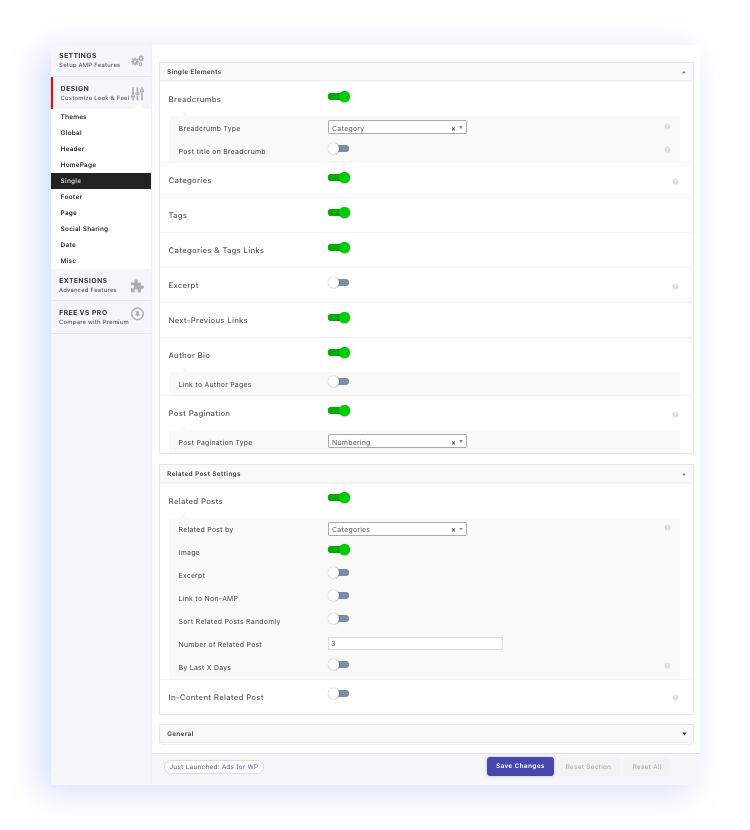
SINGLE
- Activate “Related Posts > Image
- All other settings stay by default
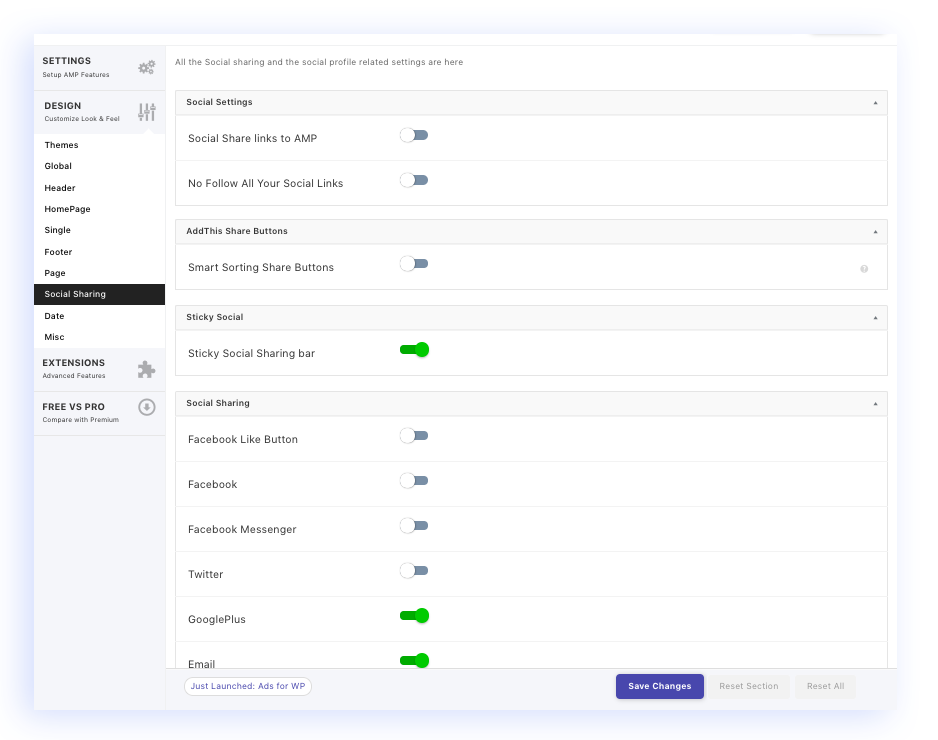
SOCIAL
- Turn off the option “Social Share links to AMP”
- Turn off the option “No Follow All Your Social Links”
- Turn off the option “Smart Sorting Share Buttons”
- Activate “Sticky Social icons”
- In “Social Sharing”, turn on necessary social networks and enter the related information to make sure social network information displays on the AMP pages.
2.3) “Save Changes”
After all necessary changes are set, click on the “Save Changes” button to activate AMP pages on your website
(Note: if you have installed a cash plugin, please clean all the cash after you click “Save Changes”)
AMP pages of your active posts should start appearing in the next few hours depending on the number of website pages and size.
In case you have any questions or require some assistance in setting up the MGID AMP site solution for your website, please contact your personal account manager for support.


